


Using the Appointment Dialog
The dbicPim component assembly (dbicPIM.dll) contains an appointment dialog to manage the details of an appointment. The control can be set to automatically display this dialog when an appointment is double clicked.
NOTE: To automatically display the Appointment Dialog when double-clicking an appointment, the control's AppointmentDialog property must be set to true.
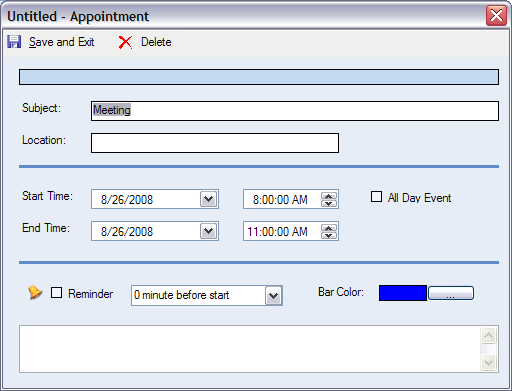
In addition to the automatic edit capability of the Appointment Dialog, the developer can choose to present the dialog anytime by calling it through code. The following code demonstrates how to call up an appointment dialog.
In this example a valid appointment has been set up for m_objAppoint and a reference to the dbicPIM.dll assembly has been created in the project.
[C#]
//Open the appointment dialog with the m_objAppoint appointment loaded.
dbiAppointmentDialog dlgAppoint = new dbiAppointmentDialog(m_objAppoint);
//Set the dialog title
if (m_objAppoint.Text.Length > 0)
dlgAppoint.Text = "Appointment - " + m_objAppoint.Text;
//Show the Appointment Dialog and test the return value (passed when the dialog closes)
if (dlgAppoint.ShowDialog() == DialogResult.OK)
//Store the Appointment Details from the dialog back to the original appointment
m_objAppoint = dlgAppoint.Appointment;
dlgAppoint.Dispose();
[VB.NET]
'Open the appointment dialog with the m_objAppoint appointment loaded.
Dim dlgAppoint As New Dbi.PIM.dbiAppointmentDialog(m_objAppoint)
'Set the dialog title
If (m_objAppoint.Text.Length > 0) Then
dlgAppoint.Text = "Appointment - " + m_objAppoint.Text
End If
'Show the Appointment Dialog and test the return value (passed when the dialog closes)
If (dlgAppoint.ShowDialog() = DialogResult.OK) Then
'Store the Appointment Details from the dialog back to the original appointment
m_objAppoint = dlgAppoint.Appointment
End If
dlgAppoint.Dispose()