


Creating and Editing Appointments
All appointments in the dbicDayView control are based upon the dbicPim.dbiAppointmentItem class. Appointments are stored in the control's Appointments collection. Appointments can be entered through code, or through user interaction with the control. The following is an example of entering an appointment through code.
[VB .NET]
Dim objAppoint As Dbi.PIM.dbiAppointmentItem
Dim dtStart As DateTime
Dim dtEnd As DateTime
'Prepare a time value based on the current time
datetimeStart = DateTime.Now.AddHours(1);
datetimeEnd = datetimeStart. AddHours(6);
'Create an appointment from the dbicPIM assembly appointment item object
objAppoint = New Dbi.PIM.dbiAppointmentItem(dtStart, dtEnd, "My Appointment ")
'Add the appointment to the dbicDayView's Appointments collection
dbicDayView.Appointments.Add(objAppoint)
[C#]
Dbi.PIM.dbiAppointmentItem objAppoint;
DateTime dtStart = new DateTime();
DateTime dtEnd = new DateTime();
//Prepare a time value based on the current time
datetimeStart = DateTime.Now.AddHours(1);
datetimeEnd = datetimeStart. AddHours(6);
//Create an appointment from the dbicPIM assembly appointment item object
objAppoint = new Dbi.PIM.dbiAppointmentItem(dtStart, dtEnd, "My Appointment");
//Add the appointment to the dbicDayView's Appointments collection
this.dbicDayView1.Appointments.Add(objAppoint);
Entering an Appointment Interactively
To enter an appointment via user interaction with the dbicDayView control:
Click on the time grid to select a cell, or click and drag an area in the time grid to select multiple cells.
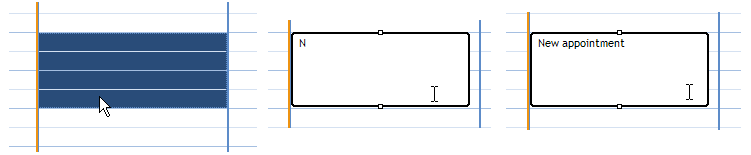
When one or more cells are selected, begin typing in the appointment text. At the point the first character is entered in the edit area, a BeforeAppointmentAdd event is fired, an appointment is created in the control's appointments collection, and the control will automatically go into appointment edit mode.
Quick Data Entry
When data is being entered / edited within an appointment and the user hits the <Enter> key, a new line will start in the edit box. In some cases the user may want the edit process to stop when the <Enter> key is pressed. This can be accomplished by setting the EnterKey property of the dbicDayView control to “Hard”.
Moving and Sizing an Appointment
The starting and/or ending time of an appointment can be changed through code and through user interaction with the appointment in the control. NOTE: In the following code nIndex refers to the index value of an appointment in the dbicDayView’s Appointments collection.
[VB .NET]
Dim objAppoint As Dbi.PIM.dbiAppointmentItem
objAppoint = dbicDayView.Appointments(nIndex)
objAppoint.Start.Hour = 12
objAppoint.Start.Minute = 30
[C#]
Dbi.PIM.dbiAppointmentItem objAppoint;
objAppoint = dbicDayView.Appointments(nIndex);
objAppoint.Start.Hour = 12;
objAppoint.Start.Minute = 30;
Interactively, the user can click and drag on the top, left (task), or bottom bar of an appointment to change its start and/or end time.
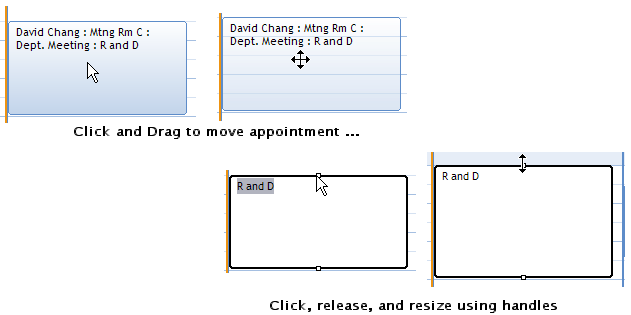
It should be noted that when an appointment is changed interactively within the control, the control will automatically check the change to see if the move is valid (See “Appointment Restrictions” for more details). If the appointment is changed through code, no internal validation takes place. Validation of appointment restrictions are the responsibility of the developer. This allows the developer to override the control's internal validation routines.
Programmable Edit Behavior … One click versus two click.
By default the dbicDayView control allows one-click editing of text and moving of appointments. Left click and drag to move an appointment. Left click and release to edit the text in an appointment.
In some applications it may be required to use a two-click edit scenario … one click to select an appointment with a second click required to edit the text in the appointment. The dbicDayView control can support this second scenario with the addition of a few lines of code to toggle the ReadOnly property of the Appointment in the AppointmentLeftClick event in the control.
NOTE: The AppointmentLeftClick event is fired when an appointment in the control receives a Left mouse click. By default this would place the appointment into edit mode however adding the following code to the AppointmentLeftClick event will select the appointment on the first click and place it into Edit Mode on the second Left mouse click.
[VB.NET]
If Me.dbicDayView1.SelectedAppointment = e.Index Then
'If the appointment getting the left mouse click is the selected appointment then this is the 'second left click. 'Set the ReadOnly status to false to allow text editing.
Me.dbicDayView1.Appointments(e.Index).ReadOnly = False
Else
'This is the first left mouse click. Set the ReadOnly status to true which selects the 'appointment but does not put it into text edit mode.
Me.dbicDayView1.Appointments(e.Index).ReadOnly = True
End If
[C#]
if (this.dbicDayView1.SelectedAppointment == e.Index)
{
//If the appointment getting the left mouse click is the selected appointment then this is
//the second left click. Set the ReadOnly status to false to allow text editing.
this.dbicDayView1.Appointments[e.Index].ReadOnly = false;
}
else
{
//This is the first left mouse click. Set the ReadOnly status to true which selects the
//appointment but does not put it into text edit mode.
this.dbicDayView1.Appointments[e.Index].ReadOnly = true;
}
Creating a Multiple Day Appointment
The dbicDayView control supports appointments that span multiple days. An appointment that spans multiple days will be placed in the all day area of the control. To create a multiple day appointment using the control:
- Set the MultipleSelect property to True.
- Set the AppointmentType property to Date. NOTE: In the case where the control is displaying a split header, the GroupType property must be set to Date.
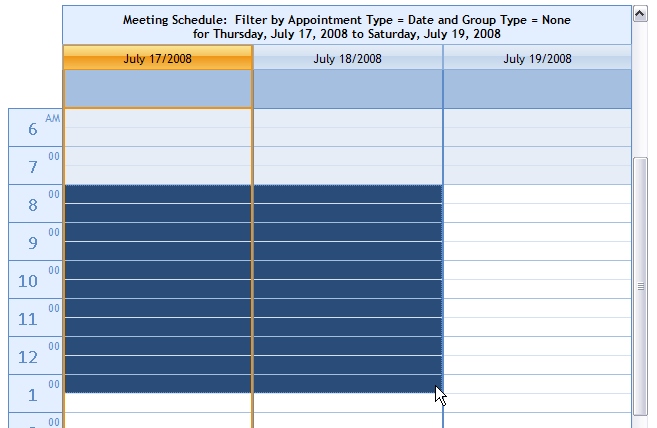
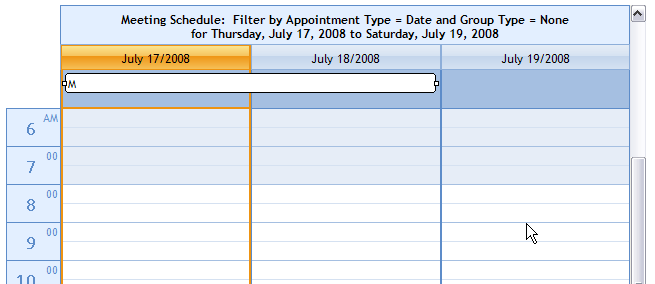
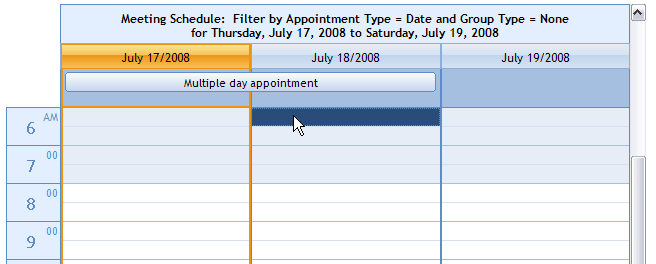
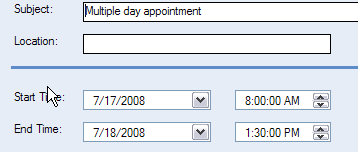
- Click and select an area on the time grid that spans more than one day and press a key to begin entering the appointment text. The multiple day appointment will be created in the all day area of the control.
Or
- Set the AppointmentType property to Date. NOTE: In the case where the control is displaying a split header, the GroupType property must be set to Date.
- Create a regular appointment as described above (Entering an Appointment Interactively).
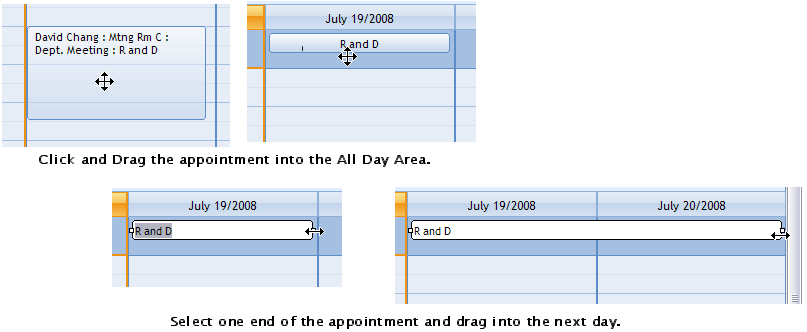
- Move the new appointment into the all day area of the control (click and drag).
- Click and drag the right or left edge of the appointment and stretch it into another column (day)
- Click and drag the appointment in the AllDay area from one column to another.
Or
- Set the AppointmentType property to Date. NOTE: In the case where the control is displaying a split header, the GroupType property must be set to Date.
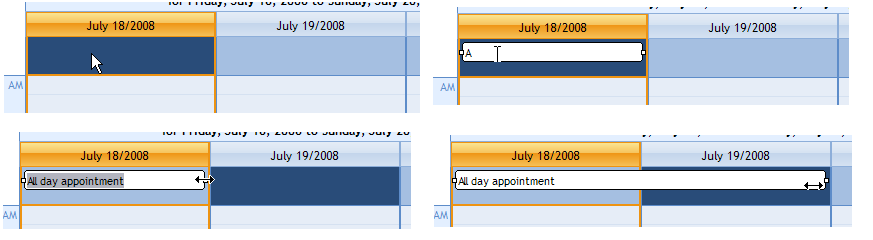
- Left mouse click in the All Day area and begin typing.
- Resize the left or right sides of the appointment to the appropriate begin and end days.
NOTE: Multiple Day appointments and All Day appointments are placed in the all day area of the control. Only All Day appointments can be moved back down into the time area of the control.
NOTE: Multiple Day appointments can only be resized (the starting and ending dates changed) with the mouse if the AppointmentType property is set to Date, or if you are using a split header, the GroupType property is set to Date. A multiple day appointment can be moved to any other column without regard to the AppointmentType or GroupType settings.
The all day area is limited to displaying a finite number of All Day or Multiple Day appointments in the All Day area. The maximum number of All Day or Multiple Day appointments that can be displayed is determined by the MaxAllDayApps property. If more appointments exist in the All Day area for a column than can be displayed, an arrow indicator box will be drawn in the bottom right side of the all day area for that column.