


Implementing Drag and Drop
The dbicDayView control includes full support for dragging and dropping appointments internally, and support for dragging appointments into and out of the control. Internal drag and drop allows the user to move an appointment from one location in the control to another location in the same control. External drag and drop allows the user to move an appointment from outside of the control into the control, or drag an appointment from inside of the control outside of the control.
Internal Drag and Drop
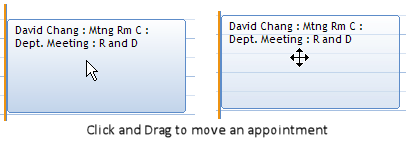
Internal drag and drop is built in to the control and does not require the developer to code any logic. To move an appointment from one location (time and/or column) to another location (time and/or column) the user holds the left mouse button down anywhere on the appointment, drags the appointment to the new location, and releases the left mouse button.
External Drag and Drop
DRAGGING APPOINTMENTS INTO THE CONTROL
To allow users to drag appointments from outside of the control to a location (time and column) inside the control, the developer must first set the dbicDayView control to allow an external drag drop operation to be completed on the dbicDayView control.
- At the inception of the drag event in the external object (PictureBox, etc.) set the AllowDrop property of the dbicDayView control to True to make the control a "target" for a drag drop operation and call the DoDragDrop method on the form with the object being dragged (in this case a new appointment).
For example, in the MouseDown event of a PictureBox place the following code … NOTE: In the following code the object being dragged is a Dbi.PIM.dbiAppointmentItem however this is completely up to the developer’s discretion as to what kind of object they prefer to drag. For the purpose of the example code the source of the drag event is placed into the tag property of the new appointment to identify the source when the drop event occurs.
[VB.NET]
Me.dbicDayView1.AllowDrop = True
'Create a new appointment to be stored as the drag data.
Dim newMeetingAppointment As New Dbi.PIM.dbiAppointmentItem
newMeetingAppointment.Text = "New Meeting ... "
newMeetingAppointment.Tag = Me.PictureBoxMeeting
Me.DoDragDrop(newMeetingAppointment, DragDropEffects.All)
[C#]
this.dbicDayView1.AllowDrop = true;
//Create a new appointment to be stored as the drag data.
Dbi.PIM.dbiAppointmentItem newMeetingAppointment = new Dbi.PIM.dbiAppointmentItem();
newMeetingAppointment.Text = "New Meeting ... ";
newMeetingAppointment.Tag = this.PictureBoxMeeting;
this.DoDragDrop(newMeetingAppointment, DragDropEffects.All);
When the mouse down event occurs on the picture box the cursor will now change to the default drag icon and respect those objects who have their AllowDrop property set to True
- Once the DragDrop operation has been started (as noted in the example above), the appointment can be dragged on to the dbicDayView control.
NOTE: As the drag operation takes place over the dbicDayView control a time slot is highlighted in the time grid to indicate the time at which an appointment will be created following a drop action.
- When the user releases the left mouse button on the time grid of the dbicDayView control the BeforeAppointmentDrop event will be fired. Using this event the developer can examine the source of the dragged item, i.e. where was the drag operation started? Based on the source of the drag operation, the developer has the ability to ...
- accept or deny the drop action.
- examine the data in the dropped object
- modify the appointment being created in the drop event.
The BeforeAppointmentDrop event passes an “e” argument which includes the following relevant properties …
- e.AllowDrop – a boolean that allows the acceptance or cancellation of the drop request.
- e.Appointment – the appointment object being created by the event. This is the object that will be automatically added to the dbicDayView control’s Appointments collection once its properties are set. NOTE: By default the start and end times of the appointment are set based on the time grid cell on which the drop took place.
- e.drgevent.Data – the drag event data. In the case of the example code above the drag event data would be the new appointment created in the picture box mouse down event.
DRAGGING APPOINTMENTS OUT OF THE CONTROL
When a drop event is accepted (e.AllowDrop = true) in to the BeforeAppointmentDrop event, a new appointment is created with a start and end time equal to the start and end time of the grid cell on which the drop event took place. Prior to completion of the event, i.e. the adding of the appointment to the control, the developer has the option of modifying the properties of the appointment by manipulating the e.Appointment values such as its contact, location, etc.
When dragging an appointment from the dbicDayView control, the user clicks and drags the appointment in the same fashion as the internal movement of an appointment. When the appointment hits the boundary edges of the dbicDayView control the BeforeAppointmentDrag event is fired.
NOTE: If no code is placed in the BeforeDragOut event the control’s drag drop functionality is limited to internal dragging of appointments only.
NOTE: The BeforeAppointmentDrag event is fired twice by the control, once to allow the code to prepare the control for dragging out (e.PrepareDrag = True) and once when the control has been prepared to go into dragging out mode (e.PrepareDrag = False).
The first time the BeforeAppointmentDrag event fires the control sets the e.PrepareDrag property to true, to allow the developer to set the control and form for a drag out operation. To set the dbicDayView control into drag mode set the e.IsDragging property in the BeforeAppointmentDrag event to True.
SPECIAL NOTE: When the e.IsDragging parameter is set to True, the appointment being dragged snaps back to its original position within the dbicDayView control.
The second time the BeforeAppointmentDrag event is fired by the control the developer sets any target controls to allow the drop and initiates the drag out operation in the form.
The following example code illustrates the inception of a drag out operation from the dbicDayView.BeforeAppointmentDrag event ...
[VB.NET]
If (e.PrepareDrag) Then
'As the appointment drag leaves set the control to prevent dropping back inside
Me.dbicDayView1.AllowDrop = False
'Set the target control(s) to accept drag/drop events
Me.LabelAppointmentInspector.AllowDrop = True
'Tell the dbicDayView control that a drag operation is about to start . This will re-set the
'appointment and the control view back to it's original position before the drag was started.
e.IsDragging = True
Else
'Store a handle to the dbicDayView control in the tag of the appointment being dragged.
'This allows for the identification of the source control when an appointment is dropped.
e.Appointment.Tag = Me.dbicDayView1
'Start the drag operation
Me.DoDragDrop(e.Appointment, DragDropEffects.All)
End If
[C#]
if (e.PrepareDrag)
{
//As the appointment drag leaves set the control to prevent dropping back inside
this.dbicDayView1.AllowDrop = false;
//Set the target control(s) to accept drag/drop events
this.LabelAppointmentInspector.AllowDrop = true;
//Tell the dbicDayView control that a drag operation is about to start.
// This will re-set the appointment and the control view back to it's
//original position before the drag was started.
e.IsDragging = true;
}
else
{
//Store a handle to the dbicDayView control in the tag of the appointment being dragged.
//This allows for the identification of the source control when an appointment is dropped.
e.Appointment.Tag = this.dbicDayView1;
//Start the drag operation
this.DoDragDrop(e.Appointment, DragDropEffects.All);
}