


Editing an Appointment
Appointments can be edited by direct user interaction with dbicDayView control, through interaction with the built in Appointment Detail Dialog, or through the use of a custom (developer designed) appointment detail dialog.
The easiest way for a user to edit an appointment is to do it directly in the control. In this manner, the user can change the text (subject), start and end times, and the column (Day, Contact, Location, Task) for the appointment.
Setting the AppointmentDialog property of the control to True displays the appointment detail dialog when an appointment is double clicked on.
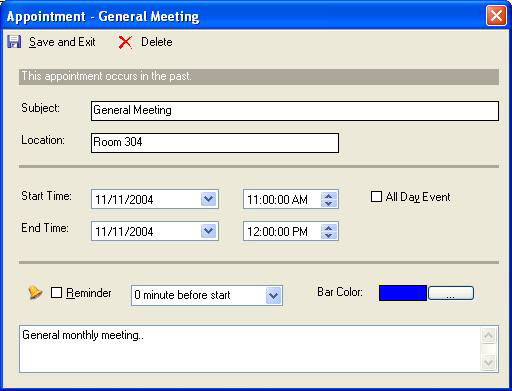
If a more detailed appointment dialog is required, the developer has the option to call up a custom appointment detail dialog.
NOTE: If a custom appointment dialog is to be used, set the AppointmentDialog property to false. This will suppress the default dialog from appearing.
To implement a custom appointment detail dialog, in the AppointmentDoubleClick event of the dbicDayView control ...
1. Call the dbicDayView control's SetForEdit method.
NOTE: The SetForEdit method forces the text from the current edit box in the dbicDayView control to be written to the appointment. It also turns the edit box invisible, disables any internal timers, and resets any other flags (such as drag) that might be active.
2. Populate the custom dialog with the appointment detail of the appointment on which the double-click event occurred.
3. Show the custom dialog.
4. If the custom dialog returns a save, update the appointment data with the custom dialog values and call the UpdateEdit method in the control.
NOTE: The UpdateEdit method forces the new text back to the edit box and notifies the control to redraw itself.
<C#>
CustomDialog dlgAppoint = new CustomDialog();
// Transfer the appointment data to the dialog fields
{ }
dbicDayView1.SetForEdit();
if ( dlgAppoint.ShowDialog() == DialogResult.OK )
{
// Transfer the dialog data back to the appointment
{ }
dbicDayView1.UpdateEdit();
}
<VB.NET>
Dim dlgAppoint = New CustomDialog
' Transfer the appointment data to the dialog fields
...
dbicDayView1.SetForEdit()
If (dlgAppoint.ShowDialog() = DialogResult.OK) Then
' Transfer the dialog data back to the appointment
...
dbicDayView1.UpdateEdit()
End If