


The dbicTips control provides the developer with many options for creating and displaying tooltips.
The simplest option for adding tooltip functionality to a form is to add the dbicTips control to the form and set its control style which will preset many of the default Header, Body, and Footer properties to predetermined values. The dbicTips control automatically extends each tip-compatible control on the form by adding a "dbiTipsText on dbicTips" property to the control in the design surface.
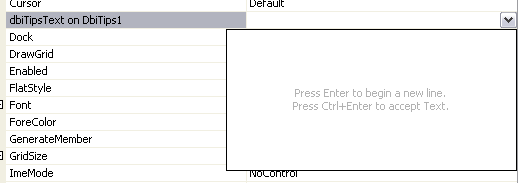
NOTE: The dbiTipsText on dbicTips property is a multi-line editor into which the developer can enter the text to appear in the tip.
At this point each control with a value in the "dbiTipsText on dbicTips" property will automatically display a tool tip when the mouse hovers over the control.
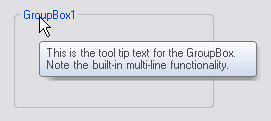
SPECIAL NOTE: The dbicTips control includes the ability to attach an ImageList from which the developer can specify images for the body in design or at runtime. To incorporate images at design time, set the dbicTips control's ImageInText property to "True". This allows the developer to specify the index value of the image to be displayed in body area by specifying the index value of the image in the ImageList as a prefix followed by a semi-colon when entering the "dbiTipsText on dbicTips" property. For example to use the first image in the ImageList in the body of the tip, enter "0;This is the tool tip text for the GroupBox."
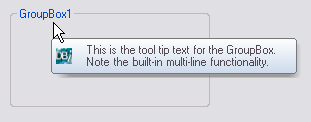
NOTE: At this point there is no header or footer defined for the tool tip.
To further enhance the tooltip display the developer has the option of defining header and footer properties. These are applied by setting the dbicTips Header, Body, and Footer properties in the design surface.
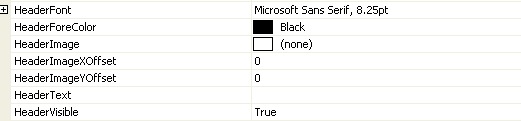
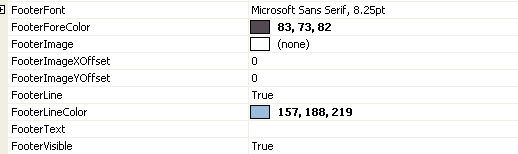
These properties will define the header and footer for all tooltips presented by the dbicTips control unless the developer chooses to override them at runtime (please see below).
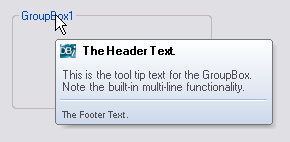
Programmatically formatting the dbicTips Tool Tips
In addition to the design-time experience provided by the dbicTips control, the developer has extensive options for customizing the tool tips at run time.
dbicTips.SetdbiTipsText Method
The first opportunity to customize the tool tips is the dbicTips.SetdbiTipsText method that takes a control and tips text as its two parameters. This method allows the developer to programmatically attach tool tips to a control in code.
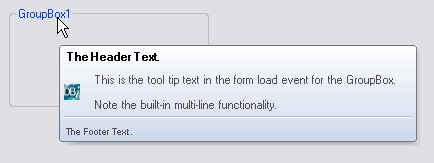
VB.NET Example:
Me.dbicTips1.SetdbiTipsText(Me.GroupBox1, "0;This is the tool tip text in the form load event for the GroupBox. " & vbCrLf & vbCrLf & "Note the built-in multi-line functionality.")
C# Sample:
this.dbicTips1.SetdbiTipsText(this.GroupBox1, "0;This is the tool tip text in the form load event for the GroupBox." + "\r\n" + "\r\n" + "Note the built-in multi-line functionality.");
DbicTips_BeforeToolTips Event
The dbicTips_BeforeToolTips event fires just before the tool tip is to be displayed. The event passes as one of its arguments the control to which the tip is attached and the dbiTipsObject containing the definition of the tip to be displayed. At this point the developer has complete control over all the properties of the tip being displayed.
SPECIAL NOTE: When displaying tips using the Control's Show method it is possible to show a tip which does not have a control associated with it. Accordingly it is recommended that if code is placed in the BeforeToolTips event the first test should be for the existence or absence of an associated control.
VB.NET Example:
Private Sub DbiTcips1_BeforeToolTips(ByVal sender As Object, ByVal e As Dbi.WinControl.Tips.BeforeToolTipsEventArgs) Handles DbicTips1.BeforeToolTips
If e.Control IsNot Nothing Then
If e.Control.Name = "GroupBox1" Then
e.ToolTips.HeaderText = "This changed in BeforeToolTips event."
End If
End If
End Sub
C# Sample:
private void DbicTips1_BeforeToolTips(object sender, Dbi.WinControl.Tips.BeforeToolTipsEventArgs e)
{
if ((e.Control) != null)
if (e.Control.Name == "GroupBox1")
e.ToolTips.HeaderText = "This changed in BeforeToolTips event.";
}
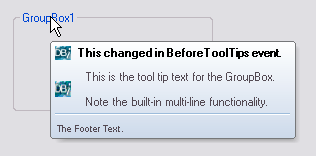
DbicTips Show Method/Hide Method
The Show method allows the developer to display a tool tip at any time using one of its 12 overloaded options. At its simplest, the Show method can be as simple as passing in Text to display at whatever time the Show method is invoked at whatever coordinates the mouse is sitting.
VB.NET Sample:
Private Sub Button1_Click(ByVal sender As System.Object, ByVal e As System.EventArgs) Handles Button1.Click
Me.DbicTips1.Show("Tips Text To Display.")
End Sub
C# Sample:
private void button1_Click(object sender, EventArgs e)
{
this.DbicTips1.Show("Tips Text To Display.");
}
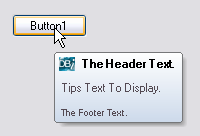
In some of the overloads the Show Method can also accept a Dbi.Wincontrol.Tips.dbiTipsObject which can be created using the New Method on the object and then setting its properties. This allows the developer to customize the tip prior to displaying it. Some of the overloads also provide for positioning and options to connect the tip to a control in the form. For an example of using the Show method please review the dbicTips Advanced Functionality Demo.
The Hide method allows the developer to programmatically hide any tool tip at any time during the execution of the code.
Irregular Shaped Tool Tips
To create irregular shaped tool tips the developer must use (or create on the fly) an image that incorporates "masking" on the areas surrounding the irregular shaped image. For example, in the dbicTips Advanced Functionality demo, the details of a shipment listed in items in a list control, are displayed in an image of a semi trailer truck. To create the tool tip the developer starts with a template image and adds to the image a graphic handle from the System.Drawing.Graphics library. This provides a drawing surface on the image to allow the addition of text into the tool tip. Once the image has been prepared, set the bodyImage of the tool tip to be displayed to the newly created image. Set the mask color of the tool tip to the color of the background in the image that should appear transparent. Set the ImageOnly property of the tool tip to True. When the tool tip is displayed only the image is presented and those areas of the image colored with the MaskColor value on the tips object will appear transparent, providing the irregular shape to the tool tip. For an example of creating and displaying irregular shaped tool tips please review the dbicTips Advanced Functionality Demo.